GradeShift Pro 2

Enquire Now

Wireless 4G dual-path signalling at any grade, with unrivalled management tools. Our dual-path signalling solution utilises a combination of two Radio paths or one Radio and one LAN path to signal an alarm. Each SIM operates on an independent network from the other for total resilience. GradeShift Pro 2 is also compatible with CSL Live and the My Base App

GradeShift Pro 2 Radio/Radio uses two active 4G WorldSIMs, each with its own radio module, one as the primary and one as the secondary path. A third standby SIM acts as a backup to the primary SIM on the primary path. GradeShift Pro 2 LAN/Radio uses LAN connectivity for its primary path and a 4G WorldSIM as its secondary path. A standby WorldSIM is also supplied.

installer-zone-product-gradeshift2

FAQs

What is the My Base App?

The My Base App is a self-service management platform for DualCom Pro and DualCom Pro 2 devices. The App allows you to check your signal strength, request regrades, send test alarms, view availability graphs, edit panel profiles, upgrade firmware and view alarm logs.

Did you find this answer useful? Yes or No

17 people did find this useful
4 people didn’t find this useful

How do I gain access to the My Base App?

Once you've installed the My Base App from your applicable App Store, please visit the CSL Website to register for a My Base account. Please click here.

For security, we’ll contact you in order to authorise your request and set the appropriate permission levels for your My Base account. Once approved, we’ll send you your login credentials.

Need Support? Call CSL Technical Support on +44 (0) 1895 474 444.

Did you find this answer useful? Yes or No

3 people did find this useful
1 people didn’t find this useful

How do I set up Multi-Factor Authentication on the My Base App?

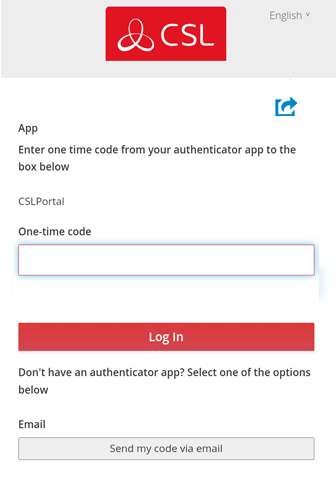
For security, multi-factor authentication (MFA) is now required to use the My Base App. MFA increases security on our platform and requires users to authenticate themselves via their username/password and with a time-limited code (each code expires after 60 seconds). This code is obtained via an Authenticator App, email or SMS. New authentication is required once every 30 days; if the user logs out or if we update CSL Live.

How it works:

  1. Log in to My Base as normal with your username and password.
  2. Receive a code via an Authenticator App, email or SMS.
  3. Enter the code within My Base.
  4. You are now securely logged in.

If you have any issues with the steps above, resetting your password will restart the authentication process. If the issue persists and you require support, call CSL Technical Support on +44 (0) 1895 474 444.

Did you find this answer useful? Yes or No

3 people did find this useful
0 people didn’t find this useful

Which Authenticator Apps work with My Base?

Here is a list of commonly used authenticators approved by CSL:

  • Google Authenticator
  • Microsoft Authenticator
  • LastPass Authenticator
  • 2FA Authenticator (2FAS)
  • Aegis Authenticator
  • Authy
  • Due Mobile
  • IBM Security Verify
  • Free OTP

Did you find this answer useful? Yes or No

0 people did find this useful
0 people didn’t find this useful

My login credentials aren't working for the My Base App, what shall I do?

Resetting your password will restart the multi-factor authentication process and resolve most issues with logging on. If you’re not receiving an email or text with your one-time access code you’ll need to call CSL Technical Support to update your contact details. Please call us via +44 (0) 1895 474 444 

Did you find this answer useful? Yes or No

0 people did find this useful
0 people didn’t find this useful

How can I fail my signalling paths without having to disconnect them?

To fail each path enter the connectivity menu (see figure 12 in full Quick Guide). Press and hold B to fail the primary path or C to fail the secondary path. The path will stay in fail for 15 mins unless you tap B or C again to restore the applicable path.

Did you find this answer useful? Yes or No

4 people did find this useful
0 people didn’t find this useful

How can I check the signal strength of each radio module?

You can check the signal strength of each radio module on a commissioned device via the My Base App. Alternatively, when in the quiescent/normal state, you can press button A to toggle to the connectivity menu. Once there, LED 1 (first path) & LED 2 (second path) will show you the signal strength. We recommend a solid green LED (40% or 4/10).

Did you find this answer useful? Yes or No

3 people did find this useful
2 people didn’t find this useful

Does my unit have a roaming SIM?

Yes, all DualCom Pro 2 devices come with at least 2 Roaming 4G SIMs

Did you find this answer useful? Yes or No

5 people did find this useful
2 people didn’t find this useful

My signal strength is less than 30% (3/10) or my LED is orange/red. What can I do to improve it?

For all radio variants:

-  Avoid coiling the aerial cable
-  Move the aerial away from electrical equipment/wiring
-  Move the aerial to a higher point in the property or closer to a window/door

Did you find this answer useful? Yes or No

2 people did find this useful
4 people didn’t find this useful

What is the standard pin setup of the GradeShift Pro 2?

As standard, the device is triggered by removing or applying zero volts to input terminals 1-8. No external pull-up resistors will be required.  This is usually achieved via the digital communicator outputs of a control panel. 

If you need to use a positive applied/removed, you can toggle the pin bias via the My Base app or contact technical support so that they can amend the bias of the device.

Did you find this answer useful? Yes or No

3 people did find this useful
5 people didn’t find this useful

Can I use the onboard serial connection as well as pin triggering at the same time with the GradeShift Pro 2?

Yes, you can.

Did you find this answer useful? Yes or No

0 people did find this useful
1 people didn’t find this useful

How do I carry out the pins self-learn feature on the Gradeshift Pro 2?

  • Ensure all required pins are in a restore/quiescent state and you are out of the device menu.
  • Whilst in Quiescent/Normal state, press and hold the C button for 5 seconds.
  • LED 3 will flash red twice once completed.

Did you find this answer useful? Yes or No

3 people did find this useful
0 people didn’t find this useful

How do I add a panel to my GradeShift Pro 2?

You can add a panel profile via My Base under the “Hardware” menu and select “Edit Panel”. Please note you only need to set panel 1 (please leave panel 2 blank).

If you are not sure which panel profile to select, please search the panel guide for your specific panel on the installer zone as the guide will confirm which panel profile you need to select. The guides can be found on online - Click here (change link to Gradeshift Pro 2 guides).

Did you find this answer useful? Yes or No

0 people did find this useful
1 people didn’t find this useful

Why are pin alarms not coming through on the alarm log?

As standard, the device is triggered by removing or applying zero volts to input terminals 1-8. If you are using a positive applied/removed to trigger the pins, you will not see any pin alarms in the alarm log until the bias of the device has been changed. 

To change the input from negative removed or applied to positive removed or applied, change the pin bias via MyBase under the “Hardware" menu and use the A+ terminal instead of RTN.

Alternatively, please contact technical support for assistance.

Did you find this answer useful? Yes or No

1 people did find this useful
0 people didn’t find this useful

Why am I not receiving SIA signals from my panel?

Your device will come pre-configured without a panel connection type (pins only). To enable the serial connection to a control panel, go to MyBase and select the panel type. To do this, follow the below steps: 

1. Go to hardware. Click on the options “hamburger” icon and select “edit panel”.

2. Select the correct panel type in panel 1 and then click on “save changes”.

3. Your device will upload its configuration and reboot. Once the reboot has taken place you should start receiving signals from the control panel.

If you are not receiving signals, make sure you have completed the panel programming steps detailed in the panel guide for that particular control panel. The guides can be found online - Click here

Did you find this answer useful? Yes or No

1 people did find this useful
0 people didn’t find this useful

Is it possible to invert the polarity of just one pin?

No, all pins either must be negative applied/removed or positive applied/removed. There cannot be a mixture of negative and positive.

Did you find this answer useful? Yes or No

5 people did find this useful
3 people didn’t find this useful

How can I carry out a path test?

To perform a test of all paths, make sure your device is in Quiescent/Normal state and then tap the C button once. LED 3 will flash to show signals are being sent.

Did you find this answer useful? Yes or No

0 people did find this useful
0 people didn’t find this useful

What is the standard setup of the GradeShift Pro 2 fault output?

All 3 outputs can be configured as either N.O or N.C as required.

Output 1 is defaulted to indicate a total path fail condition to the control panel (but it can be reconfigured to indicate another path failure type).

Output 2 can be used to indicate a path fail condition or be used as a manual trigger.

Output 3 can be used as a manual trigger.

To make any amendments please use the My Base app or contact technical support.

Did you find this answer useful? Yes or No

1 people did find this useful
0 people didn’t find this useful

How do I know if my device has started to commission?

Once the device is powered-up, you should see activity on LEDs 1, 2 and 3. When the device has commissioned, all 3 LEDs will go green for 5 seconds. The device will then reboot.

Once the device has completed its commissioning process, only LED 3 (device status) will be active whilst in Quiescent/Normal state.

You can also check the status of your device on the My Base App.

Did you find this answer useful? Yes or No

1 people did find this useful
0 people didn’t find this useful

Do I need to use the resistors provided in the box?

You should only use the resistors provided if the installation needs to be EN-54 compliant.  If unsure, please check with your ARC.

Did you find this answer useful? Yes or No

3 people did find this useful
3 people didn’t find this useful